
A Budget Friendly House Update (BFHU) for the bathroom.


The MLS photos of the house we bought literally showed it in the best light – like with a magic filter that brightened all the rooms, blurred the cracks in the walls, and changed the tint of the tile in the split bathroom. Because of the bright yellow tile and faint moldy smell, updating the bathroom was a priority.
Ideally we would have loved to gut the split bathroom and merge the rooms into a shiny new full bath, but we’d sunk all of our funds into the downpayment. That tile though. So I had a google and found the Homax “Tough-as-Tile” Tub & Sink Refinishing Kit ($38 at Home Depot). I think this stuff is really intended for smaller jobs, but I figured if I could give our bathroom a facelift for less than $40 per box it was worth a shot. I picked up 4 boxes of the Homax brush-on product ($38×4), a vanity that was on sale for $99 (similar here), a faucet for $40 (similar here), a new light fixture for $80 (similar here), and some paint. I then spent a three day weekend on the project.
(Instructions say don’t use an electric sander, but do you see all those tiles?!?!)


I used the Homax product to paint the tiles on the walls and in the shower. I did not use the product on the tub itself. To prep the tiles I used an electric hand sander with 35-40 grit sandpaper and I went over the tiles with the sander only once. I note this because there are warnings not to use an electric sander as it could tear up the surface, but I did not have an issue. The instructions also say to prep the area by sanding three times, but I did not have the patience. I do think some additional sanding prep would have been beneficial, but for me it wasn’t worth the time or energy.
(The tub appears to bow a bit, but that’s just my bad photography. What’s that brown stuff? #gross)


The actual painting of the Homax product takes s o m u c h l o n g e r than I thought it would. The paint is thick and sticky, and you really need to apply it in relatively thin coats for an even finish. I also found that the instructions aren’t kidding when they say to paint in a single direction with overlapping strokes. If you think this stuff will go on just like painting a wall in your living room, you are wrong. If you are painting a large area it will take a long time and it will be painfully slow and it will suck. I also did not follow the instructions about using a good quality mask and I was quite ill with a horrible headache the next day… but some inexpensive Advil fixed that.
(Forgot to mention that I had an old mirror that I repurposed over the sink here. And yes the cavity of lathe and plaster is simply hidden behind it.)


It took 3 cans/kits of the Homax product to paint 2 coats for my project. I kept the 4th can for touch ups, and it turned out that I needed it (though not a lot). When I taped the tiles to paint the walls, some of the tough-as-tile paint pulled off when I removed the tape. There were only 3-4 bits that pulled off, and the amount that pulled off was smaller than a fingernail in size. I just touched up the few spots with the extra product, no biggie. For what it’s worth, I think the bits might not have pulled off had I done the 2nd or 3rd recommended sanding/prepping sessions. Also, definitely wait the full 72 hours cure time per the instructions too!
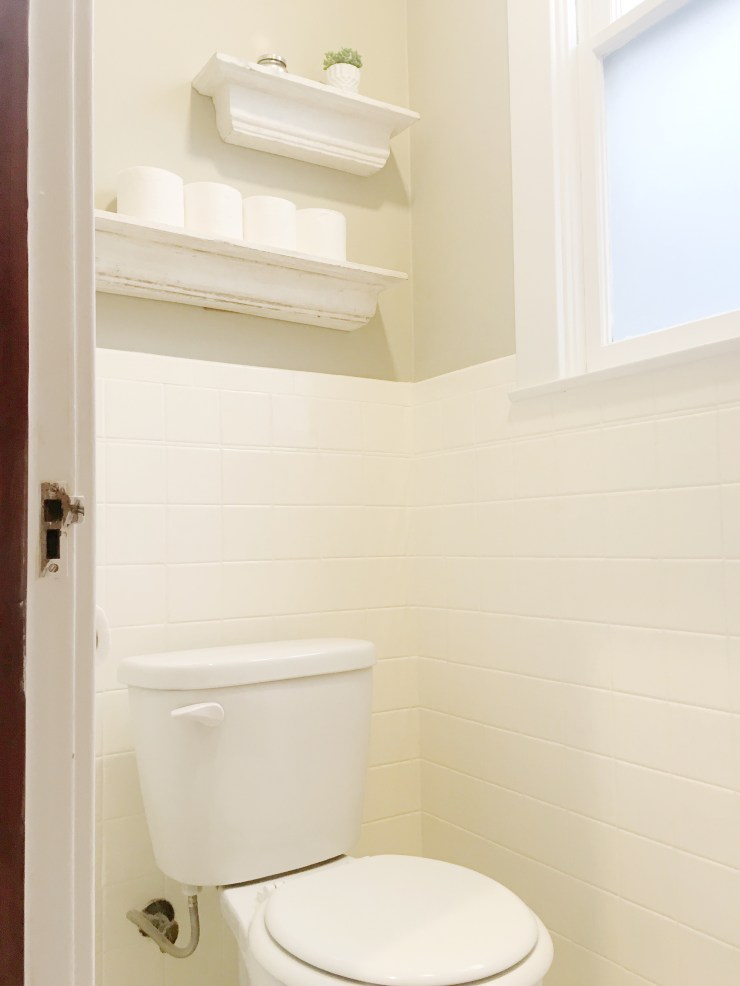
All in all we are very pleased with the results. It’s been over 2 years since we painted the bathrooms, and so far so good! We were able to completely re-do the (split) bathroom for less than $400 and would highly recommend the Homax product to anyone with icky tile to cover on a budget!


Happy renovating!
xoxo

Published by