BFHU – photo project

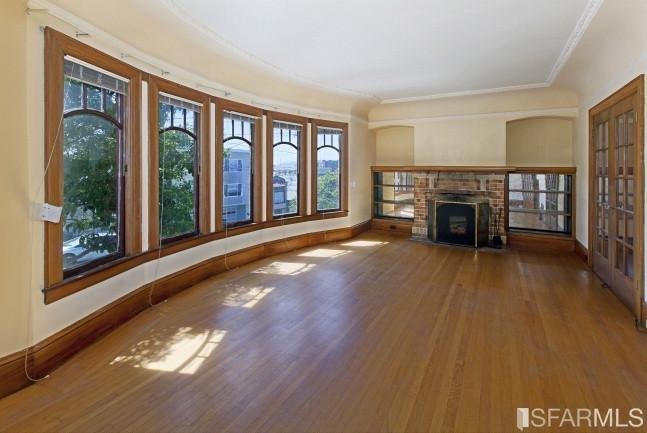
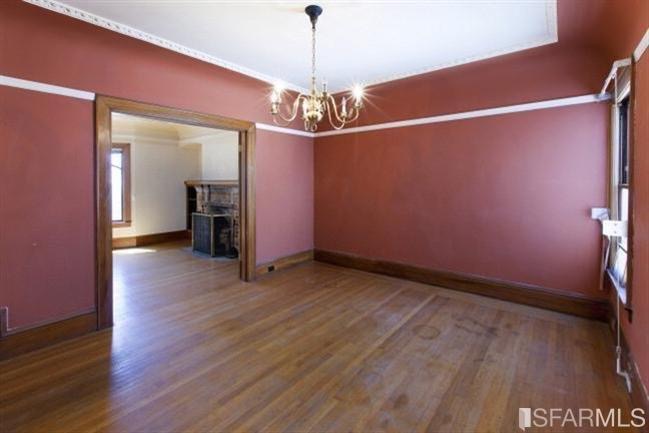
Our house has been undergoing a renovation for the past 6 months (ughhhh… be done already!).  While our home has come a long way from when we bought it 4 years ago (see original pics here!), it is still a ways from being finished and decorated.  I have once again started working on some budget friendly house updates, or BFHUs.  A recent project being inexpensive wall art.

First I found some photos on my iPhone from various urban hikes around San Francisco that I liked.  Then using my phone I cropped the images, turned them black and white, and ordered some prints at my local Walgreens.

I wanted simple frames with clean lines and white matting.  I ended up going with a couple of CB2 frames for the living room.  They come in various sizes and prices range from $25 to $70.  And I picked up some similar frames from Target for the dining room for $17 each.

 CB2 gallery frames

Target gallery frame

And voila!

Inexpensive and meaningful artwork all over the house 🙂

FullSizeRender (32)

(Bisou working on her Tinder profile pic…)

xoxo
-ash


BFHU – raw edge dining table

I have always coveted raw edge dining room tables. That being said, the one I found and fell in love with was $25,000! Can you believe that? So, I set out to make my own, to seat 8- and under $2,000! 

I first needed to find the wood slab. I started by of course googling “raw wood slabs” in my area. This came back with no luck. I then got the idea to call local cabinet shops. Sure enough, a cabinet shop near me had several different types of raw wood slabs! This is the part of the project that can cause you to stay in budget or go way over. Depending on the type of wood and size, you can find one for $500-5,000. I went over and found one in my budget (under $1,000)  and roughly the proper size. They offered to cut it down a little bit on one end- which was helpful. It needed to be fully dried- so they continued to do that for me, and a few weeks later he had me come take a look. 

IMG_3376

It had a few splits in the wood that needed to be filled with resin, and the owner of the shop also recommended re-enforcing them with “bowties” so it would not continue to split. At the time I was doing this, I was very pregnant so a few of the tasks- like the resin, I could not do (heavy duty chemical). So, for a fee of about $300, they completed the bowties and resin for me. 

IMG_3377

When I finally managed to get the slab home, I took a power sander to it and smoothed it down- both sides. You can imagine my husband’s face every time I needed it turned over. It is HEAVY! I removed some of the natural bark along the edges, but chose to keep some of it to make sure and give it that raw-edge feel.

IMG_3378

Once sanded, it was time to seal it. The owner of the cabinet shop suggested using Waterlox. It is what he uses in his shop. This required several coats with a foam brush, and in small sections- both sides of the table and along the edges. The directions on the Waterlox website are excellent- please refer to those for more detailed instructions. Make sure to be in a well ventilated area that is free from dust! You don’t want little particles getting in your sealer. I also recommend a mask- this stuff is STRONG.

Screen Shot 2016-08-23 at 9.50.37 PM

After it was completely dry, I installed the legs. The legs I designed with a gentleman I found on etsy. There are several vendors on there willing to make metal legs- It just depends on the style and price point you are going for. We worked together to figure out the best legs to give me the look I wanted, while staying in budget,and most importantly supporting the massive slab.

IMG_3379

drum roll please….

IMG_3413

IMG_3407

IMG_3408


Final cost: approx. $1700. 

I get more compliments on this table than any other piece of furniture in my house. I love being able to say I made it! I have now used the table for close to 3 years. I am proud to say that it doesn’t show a bit of wear- and that is saying something, with two little kids eating, coloring, and crafting on it daily!


xox

aj


BFHU – the fireplace

A budget friendly house update (BFHU) for the fireplace.  Here are the details of my experience, and some super simple directions for whitewashing brick.

IMG_8194

It was a tough decision whether or not to paint the brick fireplace.  While we love the look of natural stone and brick, our fireplace was just not working.  And those mirror tiles in the back of the shelves… wow.

I started by getting rid of the mirror tiles, which came down surprisingly easily.  And to our   surprise we found that the wall was made of thin wooden planks and was signed and dated by prior owners!  Super cute.  After removing the tiles I sanded the wooden planks a bit to remove any leftover sticky from the mirrors and wiped away the dust with a damp rag.

With the wall prepped I wanted to start painting straight away.  Literally could not wait, so I used some white paint we had leftover from painting trim around the house (Benjamin Moore Regal Select in White with Pearl Finish).

IMG_8235

And when I was done it looked SO MUCH BETTER! … but still didn’t feel quite right :-/

IMG_8236

(Still less than good, huh?  Yah, I was a bit bummed too.)

All that work, and it still felt like a cluttered mess with no clear style direction.  Sigh.  But that was about to change.  My mom and sister came for a visit and the three of us decided to see what the fireplace would look like white.  So we read some online tutorials for whitewashing brick, watched a couple YouTube videos, and went to work.

As an aside, I might suggest giving your husband or domestic partner a heads up before beginning similar projects.  I did not, and there was an initial adverse reaction.

A short time later, the fireplace was white – glorious gleaming white!

IMG_8242

I instantly LOVED the crisp clean feel of the white… but how to style it?!  Well the big style reveal and details will be up on the blog soon.  In the interim I’ll leave you with some super simple whitewashing instructions.  🙂


Whitewashing Brick

You’ll need:  

  • rags
  • painter’s tape (optional)
  • drip cloth (optional)
  • paint brushes
  • white paint (we used Benjamin Moore Regal Select in White, Pearl Finish)
  • 1/2 gallon(ish) sized container  (we used tupperware)

Directions:

  1. Use the painter’s tape and drip cloth to cover anything you don’t want paint to get on.  (good luck)
  2. Using the 1/2 gallon container, mix some white paint with water –  roughly 50/50 mix depending on how opaque white you want the result. (FYI:  We ultimately decided we wanted the bricks solid white, so our ‘mix’ got progressively thicker… hindsight we probably could have just applied the paint straight from the bucket.)
  3. Paint a section of the bricks (maybe 1.5 ft square) and then dab at the wet paint with a rag to give a slight texture and remove any drips.
  4. Then move on to paint another section of bricks, dab at the wet paint, and repeat.  After 5-10 minutes you’ll notice that the bricks will have absorbed some of the paint and the white will fade a bit.  Simply keep repeating the process until the desired color is achieved.

IMG_8250

Happy renovating!

xoxo


BFHU – the bathroom

A Budget Friendly House Update (BFHU) for the bathroom.

The MLS photos of the house we bought literally showed it in the best light – like with a magic filter that brightened all the rooms, blurred the cracks in the walls, and changed the tint of the tile in the split bathroom.  Because of the bright yellow tile and faint moldy smell, updating the bathroom was a priority.

Ideally we would have loved to gut the split bathroom and merge the rooms into a shiny new full bath, but we’d sunk all of our funds into the downpayment.  That tile though.  So I had a google and found the Homax “Tough-as-Tile” Tub & Sink Refinishing Kit ($38 at Home Depot).  I think this stuff is really intended for smaller jobs, but I figured if I could give our bathroom a facelift for less than $40 per box it was worth a shot.  I picked up 4 boxes of the Homax brush-on product ($38×4), a vanity that was on sale for $99 (similar here), a faucet for $40 (similar here), a new light fixture for $80 (similar here), and some paint.  I then spent a three day weekend on the project.

(Instructions say don’t use an electric sander, but do you see all those tiles?!?!)

I used the Homax product to paint the tiles on the walls and in the shower.  I did not use the product on the tub itself.  To prep the tiles I used an electric hand sander with 35-40 grit sandpaper and I went over the tiles with the sander only once.  I note this because there are warnings not to use an electric sander as it could tear up the surface, but I did not have an issue.  The instructions also say to prep the area by sanding three times, but I did not have the patience.  I do think some additional sanding prep would have been beneficial, but for me it wasn’t worth the time or energy.

(The tub appears to bow a bit, but that’s just my bad photography.  What’s that brown stuff?  #gross)

The actual painting of the Homax product takes s o  m u c h  l o n g e r than I thought it would.  The paint is thick and sticky, and you really need to apply it in relatively thin coats for an even finish.  I also found that the instructions aren’t kidding when they say to paint in a single direction with overlapping strokes.  If you think this stuff will go on just like painting a wall in your living room, you are wrong.  If you are painting a large area it will take a long time and it will be painfully slow and it will suck.  I also did not follow the instructions about using a good quality mask and I was quite ill with a horrible headache the next day… but some inexpensive Advil fixed that.

(Forgot to mention that I had an old mirror that I repurposed over the sink here.  And yes the cavity of lathe and plaster is simply hidden behind it.)

It took 3 cans/kits of the Homax product to paint 2 coats for my project.  I kept the 4th can for touch ups, and it turned out that I needed it (though not a lot).  When I taped the tiles to paint the walls, some of the tough-as-tile paint pulled off when I removed the tape.  There were only 3-4 bits that pulled off, and the amount that pulled off was smaller than a fingernail in size.  I just touched up the few spots with the extra product, no biggie.  For what it’s worth, I think the bits might not have pulled off had I done the 2nd or 3rd recommended sanding/prepping sessions.  Also, definitely wait the full 72 hours cure time per the instructions too!

All in all we are very pleased with the results.  It’s been over 2 years since we painted the bathrooms, and so far so good!  We were able to completely re-do the (split) bathroom for less than $400 and would highly recommend the Homax product to anyone with icky tile to cover on a budget!

IMG_8147-1IMG_8148IMG_8146-1

Happy renovating!
xoxo


BFHU – preamble

Finally!  As promised this is the kickoff to several installments of Budget Friendly House Updates (BFHU), a series of blog entries that highlight some relatively simple and cost effective ways to take your space next level!

For those that don’t know, we live in San Francisco where the housing market is insane.  It is very common for multiple all cash offers to be made at well above the list price.  When we purchased our home 3 years ago, we did not have the option of making an all cash offer.  We barely had enough for 10% down.  To be as competitive as possible, we would routinely waive all contingencies, including inspections, and submit our offer with a personal cover letter detailing in earnest how we would love and care for the home.

When we made the offer on our current home, we had been house hunting for half a year, submitted offers on 4 homes, and were becoming discouraged.  We learned that 32 offers had been submitted, and that we were not the highest or the cleanest offer, and yet the seller chose us.  Then our lender tried to renege, but that’s another story.  We closed on the house 2 weeks later and words cannot describe how lucky we felt and still feel.

Since that time we have been tackling one project after another to fix up the house; keeping our promise to love and care for the home as we make it our own.

As a starting point, below are the photos from the original MLS listing for reference.

entry hallhouse2

living roomhouse3

dining roomhouse4

kitchenhouse5

hallwayhouse6

bathroom

house10

master bedroom and sunroomhouse7

sunroomhouse8

guestroomhouse9

backyard
(fyi – those are very large and thorny blackberry bushes)

house11

xoxo