Granola

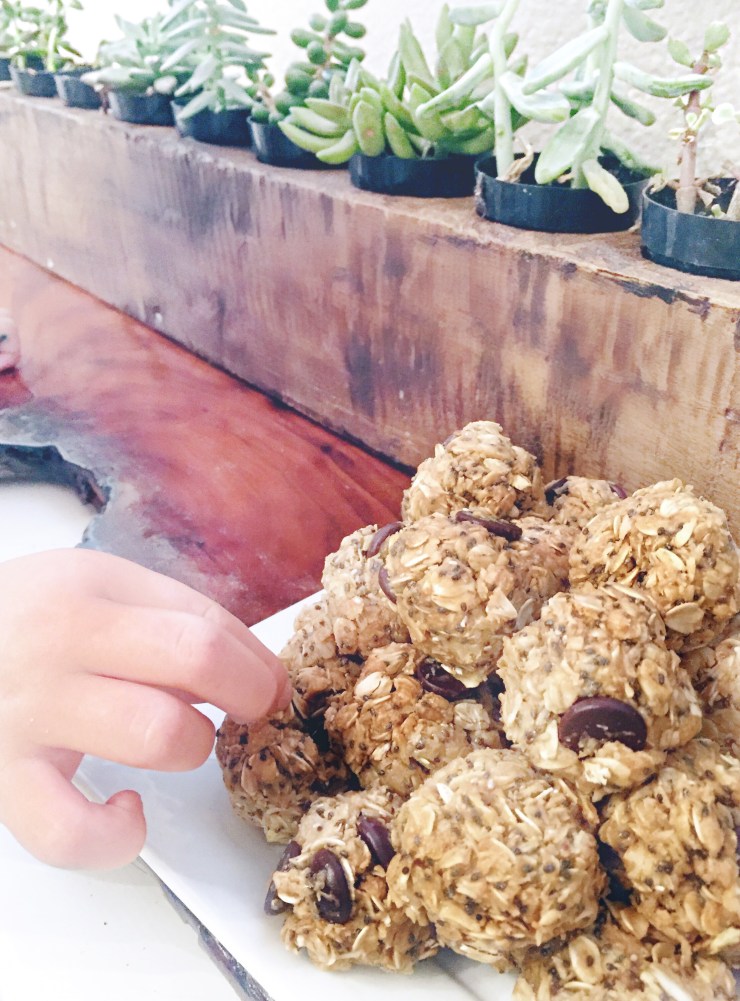
I introduce to you my recipe for yummy granola- which is adapted from the granola recipe of the lovely Kristin Andrus  {check her out for amazing recipes!} You can really add anything you want to this! Make it your own. Remove the things your family doesn’t love and add the things they do. We love coconut around here so sometimes I add extra! IMG_3776Granola

  • 5.5 cups Old Fashioned Oats
  • 1.5 cups sliced almonds
  • 1/2 cup pecans- chopped
  • 1/2 cup walnuts- chopped
  • 1 cup flaxseed
  • 1 cup unsweetened coconut flakes or shredded coconut
  • cinnamon to taste 
  • 1/2 cup oil
  • 1/2 cup honey
  • 1/4 cup maple syrup or brown sugar (if you like it sweeter- add more!) we use maple syrup in our house 
  • 1 tbsp vanilla extract

Mix together the oats, nuts, flaxseed, coconut, and cinnamon in a large bowl. Mix the oil, honey, brown sugar and vanilla together in a pot on the stove- heat until slightly bubbly and completely combined. Then, pour over the dry mixture and mix together. Once everything is coated, divided the mixture between two large baking/jelly roll pans. Bake at 300 for 15- 20 minutes. You do not want this to burn! It will not look golden- it will continue to cook/harden when you bring it out of the oven. Once cooled, keep in an airtight container. Enjoy 🙂 Use as a cereal, on top of yogurt, mixed with peanut butter & an apple!

protein balls

These protein balls are probably my favorite snack- as well as my kids. They think they are cookies! They are the perfect after lunch treat- or post run protein fix.

IMG_3375

Protein Balls

  • 1 cup oats
  • 2/3 cups unsweetened coconut
  • 1/2 cup unsweetened peanut butter (read your labels! It should just contain peanuts)
  • 1/4 cup Ghirardelli Chocolate 60% Cacao chips
  • 1/3 cup honey
  • 2 tbsp chia seeds
  • 1 tsp vanilla

Combine all ingredients in a large bowl. Refrigerate for 30 minutes

Roll and compress the mixture into 1 inch rounds and place in an air tight container. Refrigerate and enjoy for up to one week… if they last that long!

spooky treats

Those that know me, know I love to throw a party! Especially a halloween one! Today I am going to show you some of my go-to halloween party food items. Easy, fast, and super cute!

IMG_3694

Monster cake, poison apples, mummy jalapeño poppers, ‘witch’s brew’ root beer, sugar cookie candy corns, popcorn hands, magic wands, cheetoh pumpkins and spider web cupcakes- oh my! All of these are so simple and fast to make- which is needed when you are throwing a party.

I typically shy away from your “normal” holiday colors. I’m a sucker for purple, black, and green for halloween.

IMG_3695

For instructions on each of these fun party foods- see below!


Mummy Jalapeno poppers

10 jalapeno peppers- slice in half length wise. {I left the stems on and seeds in for an extra kick!}
8 ounces cream cheese- room temperature
8 ounces jack cheese- shredded
1 scallion- finely chopped
2 t. Lemon Zest
1/2 tsp salt
1 package refrigerated crescent rolls
2 eggs- beaten
1 Package candy eyeballs {I purchased mine at Michaels- you can find them at walmart, amazon, target, etc}

Preheat oven to 400° F. In a bowl, mix the cream cheese, jack cheese, scallion and salt together. Roll out the crescent rolls and separate into 4 rectangles- not the pre-cut triangles- with a perforation in the middle of each. Press your fingers into the perforations to seal them. You don’t want them splitting along the pre-cut areas. Cut each rectangle into 10 long pieces lengthwise.

Fill each jalepeño half with the cheese mixture. Wrap each jalapeño half with the dough, leaving a space for the eyes. On some I used a couple pieces of the crescent strips. Brush with egg mixture and place on baking sheet.

Bake in oven for 8-10 minutes. Once cooked, and slightly golden brown, remove from the oven and press the eyes onto them where you left an opening along the top. Serve while hot!


Candy Corn Sugar Cookies

2 Sticks Butter, softened
1 c. Sugar
1 Egg
2 T. Lemon Juice
2 t. Lemon Zest
1/8 t. Salt
3 c. Flour
1/2 t. Baking Soda
Purple Food coloring
Green Food coloring
Granulated sugar to sprinkle on top

Combine butter and sugar in a large bowl; beat at medium speed until creamy. Add egg, lemon juice, lemon zest, and salt. Continue beating until well mixed. Add flour and baking soda, beat until well mixed. Divide dough into thirds. Press one-third of the white dough evenly into the bottom of a loaf pan that you have lined with foil, wax, or parchment paper. Place another one-third of the dough into a bowl and add purple food coloring to it. Once it is mixed evenly, press the purple dough evenly over white dough. In another bowl, add the rest of the dough and the green food coloring. Press the green evenly over the purple dough. Cover and refrigerate until firm (2 hours or overnight is best). Once chilled, flip over your loaf pan and unwrap your dough. Flip it back over and get ready to cut! Cut loaf crosswise into 1/4-inch slices using a sharp knife, trimming edges to make even, if necessary. Cut each slice into wedges.

Place 1-inch apart onto a lightly greased cookie sheet. Bake for 7-10 minutes in a pre-heated 375 degree oven. Place cookies straight into a bowl with sugar and coat. Place coated cookies on a baking rack to cool.


Monster Cake

1 of your favorite cake box mixes or your favorite homemade batter
Homemade frosting or store bought!
1 package Oreos
1 package Oreos Minis
Regular chocolate chips
1 Box of Junior Mints

Mix, bake, layer, and frost your cake! Any flavor or colors you like! Once assembled- you can make your monster eyes. Separate all your Oreos and place them in pairs. Then, take some leftover frosting and attach the chocolate chips to the mini Oreos, and the junior mints to the regular Oreos. Once finished, use a little frosting on the back of each cookie to attach them sporadically all over the cake! Super simple and sure to be a hit!


Poison Apples

2 cups granulated sugar
3/4 cups water
1/2 cups light corn syrup
black gel food coloring
6 {or 12 small} green apples. Make sure they are not waxed!


Grease a piece of baking paper and place on a tray/baking sheet. Insert a skewer/popsicle stick/etc in all the apples and set aside.

In a medium pot, combine the sugar, water, corn syrup and food colouring and stir over medium heat until the sugar has dissolved. It should feel smooth. When the sugar has dissolved, turn the heat up and keep the sides of the pot clean with a pastry brush dipped into clean water to prevent it from crystalizing. Bring the mixture to a boil until a candy thermometer reaches 150°c/310°F, or hard crack stage.

Carefully dip the apples into the hot candy mixture and place on the wax paper to set and cool. Enjoy your poison apples! Not just for a party but, you could tie a ribbon to the stick and hand them out to friends as a fun treat!


Spider Web Cupcakes

1 box of your favorite cake mix
Homemade {or store bought} frosting & food coloring if you are wanting a color
1 Package Chocolate almond bark
Wax paper
Cupcake liners

Mix and bake cake mix according to directions- in regular size cupcake tins with liners. While they are baking, print out you favorite spider web template from here. You can print a few copies, or just slide it around, whichever you prefer. Place it underneath wax paper. Now, melt your chocolate almond bark according the package directions. Once melted, pour it into a plastic baggie and cut off one of the tips of the baggie- very very small cut! You are just wanting to make a tiny hole. Then, carefully trace your template on the wax paper. Repeat. Let them cool to harden.

Once your cupcakes are cooled, frost them and before the frosting hardens up a bit, carefully push one of your spiderwebs into the frosting. Voila!


Witches Brew Root Beer

2 oz bottle of root beer extract
2 cups sugar
1 gallon of water
Dry ice

Fill your container with 1 gallon of warm water- you want it warm because it will help the sugar dissolve. It also makes the dry ice more effective!

Add the root beer extract and sugar. Stir until the sugar dissolves.

Add the dry ice {do not touch it with your bare hands!} 10-15min prior to serving. You will need to let the dry ice do it’s thing for at least 10 minutes to cool and carbonate the root beer. Drink up!


Popcorn Hands

1 box unwaxed plastic, clear gloves
Homemade or store bought popcorn
1 bag of candy corn
ribbon
**optional: spider rings

Fill each finger of the gloves with a candy corn. Then stuff popcorn into the glove until full. Once full to your liking, tie off with a ribbon! Feel free to add a spider ring to one of the fingers for an extra spooky touch! Great for kid school parties!


Witches Hats

1 Package Keebler Fudge Stripe cookies
1 Package Hershey’s chocolate kisses
Homemade frosting or a tube of store bought in whatever color you prefer!

Lay out the fudge stripe cookies upside down on the counter/platter. Squeeze  small amount of frosting in the center and press on a hershey’s kiss candy {unwrapped}. Let set- and you’re finished! How simple was that!?


Magic Wands

1 Package of pretzel rods
2 Packages of white or chocolate almond bark (depending on if you are going to add food coloring)
Food coloring in the colors of your choosing.

Melt the almond bark according to the package directions- In mine above, I used the chocolate almond bark- pour it in to a tall cup. Next, dip your pretzel rods into the mixture and lay on parchment/wax paper to cool.

Then, melt the white chocolate (to be like the ones above) and separate into two bowls and add the food colorings of your choice. Once mixed, put the chocolates in to two separate plastic baggies. Cut diagonally across one of the bottom corners and drizzle the chocolate over the pretzel rods. Repeat with the other color(s). Let cool to harden!


Orange Pumpkins/Ghostly Bananas

Cutie Oranges
Bananas
Regular and mini chocolate chips
Black Sharpie

Draw a pumpkin face on each cutie orange with the sharpie.

Peel the bananas and cut them in half. Then place mini chocolate chips for the eyes, and a regular size chocolate chip for the mouth. Finished. So simple! Perfect for kid school parties!


Happy partying!


xox

aj

blue apron, gobble, and hello fresh

Unlike my sister, I do not enjoy cooking.  It’s not the actual cooking part that’s so terrible, but the menu planning, grocery shopping, putting away the groceries,  and prepping the meats and veggies that really take a toll.  By the time I’ve done all that plus the cooking bit, the meal is usually an overhyped disappointment that then has to be cleaned up.  Ugh.

So when I heard about services that deliver recipies and the necessary groceries straight to your door, I started trying them all.  The ones I have used the most (thus far) are Blue Apron, Gobble, and Hello Fresh.


Blue Apron

How it works:  Subscribe for either the “for two” plan at $59.99 per week, or the “family” plan at $69.92.  The “for two” plan provides 3 meals per week (6 servings total), and the “family” plan provides either 2 or 4 meals per week (8 servings total).  You can choose the meals you want to receive from the 4-6 meals offered that week.  It is a subscription service, so once you sign up you automatically receive meals each week unless you remember to login and skip a week.  And you can cancel the subscription at any time.  FYI- Even though it’s just me and the hubs, I usually opt for the “family” plan so that there are left overs for another meal or two 😉

How it compares:  In my experience, the Blue Apron meals are the most complex and take the most time to make.  Most of the ingredients arrive un-washed, un-prepped, and thrown together in singe box (other services separate the ingredients by meal).  The instructions are pretty detailed, and there are generally more instructional steps to follow than with other services I’ve tried.  For me, more steps unfortunately means more room for error, and I have not had a 100% success rate with the Blue Apron meals.  That said, many of the meals use interesting ingredients that I would not otherwise have tried to cook with, so that’s fun.  And I don’t think I ever made one that required a microwave(I don’t like microwaves), so kudos on that!

Takeaway:   Good for trying something new, particularly if you like to cook or want to make a date night event of it.  These days I only order Blue Apron as a date night activity or as a fun way to get houseguests involved with making dinner.  The recipes are just too complicated for me to enjoy tackling on my own.  Remember though, cooking really isn’t my thing.


Gobble

How it works:  Subscription options are 3 dinners for 2 people (6 meals, or $71.70), or 3 dinners for 4 people (12 meals, or $143.40).  You can login online to remove or change meals for any week and pricing is based on the number of meals ordered:  $11.95 per meal if you order at least 6 meals; $13.95 if you end up only ordering 4 meals.  So for 6 meals it would be $71.70, and for 4 meals it would be $55.80.  As with the other services, you can choose your meals, skip weeks, and cancel at any time.

How it compares:  Sooo easy and quick to get from fridge to hot on the table.  The service boasts “from kit to table in 10 minutes”, which might be possible if you practiced and felt like racing through the process.  I prefer to kick things off by pouring a glass of wine and I clean up as I go so there is minimal to do after I eat.  But even with my slower approach to cooking I manage to get Gobble meals to the table within 20 minutes or so.  And the food is consistently good.  The ingredients arrive separated by meal, and many of the ingredients are already washed and some pre-prepped.  I don’t like that microwaving is regularly listed in the instructional steps, but if you don’t care about racing the food to the table you can simply heat those bits on the stove.

Takeaway:  Super simple, fast, and good.  The weeks that I have Gobble, I feel I eat better and I am happy to “cook”.  If you’re one of those that really enjoys cooking though, this may not be the service for you.  Some meals may feel more like glorified food assembly than an actual culinary activity, but for me that’s just fine.


Hello Fresh

How it works:  Subscribe to receive a “classic” box for 2 at $69.00, a “veggie” box for two at $59.99, or a “family” box for 4 at $105.00.  Each box contains 3 meals and the 3 meals are pre-selected for you, but you can swap them by logging into your online account (assuming you remember to do so in time).  And same as the others you can skip a week or cancel at any time.

How it compares:  To me, Hello Fresh is a simpler version of Blue Apron.  The ingredients all arrived separated by meal, but for the most part un-prepped.  Each meal seems to have a relatively small number of ingredients, and the instructional steps were also fewer.  And I am proud to say I have had a 100% success rate with the Hello Fresh meals!  I even kept some of the recipe cards for future use.

Takeaway:  Relatively quick and easy, and consistently good.  More prep required than a Gobble meal, but less complicated than a Blue Apron meal.  This service is good for those who want to make a good, simple dinner from scratch without the hassle of meal planning and grocery shopping.


Happy cooking!

xoxo

ash

easy breakfast. zucchini muffins

Marathon training is underway, which means- I am hungry all the time! I have a few staple things I make weekly that my family lives on. Typically, every Monday, I am in the kitchen whipping up our protein cookies, protein balls, granola (more on those two soon!) and zucchini muffins. Today I am going to share the healthy zucchini muffin recipe!

Zucchini muffins have been a life saver for me on busy school mornings. A bonus with these muffins is you can make big batches, freeze them, and pop some out the night before for the next morning!

Zucchini muffins

  • 1 2/3 cups white whole wheat flour (or all-purpose)
  • 1/2 cup ground flaxseed
  • 1 tsp baking powder
  • 1 tsp baking soda
  • 1 tsp ground cinnamon
  • 1/2 tsp salt
  • 1 egg
  • 1/2 cup maple syrup
  • 1/2 cup almond milk (or whatever you prefer)
  • 1/4 cup melted coconut oil
  • 1 tsp vanilla extract
  • 1 1/2 cups grated fresh zucchini (about 1 zucchini)
  • 1/3 cups old-fashioned oats (uncooked)

Preheat oven to 350 degrees. Grease, or line with paper liners a 12-count muffin pan.

Whisk together flour, baking powder, baking soda, cinnamon, flaxseed, and salt.

In a separate bowl, whisk together the egg, maple syrup, milk, coconut oil and vanilla extra. Pour this mixture into the dry ingredient mixture and stir them together JUST until combined. Do not over mix. Once combined, stir in the grated zucchini and oats.

Divide batter evenly between the 12 muffin cups- sprinkle the top of each muffin with some oats. Bake for 18-20 minutes.

Let cool to room temperature and store in a sealed container for 2-3 days or freeze them for an easy, yummy, fast, future breakfast!

**if you want a sweeter muffin- throw in 1/4 cup brown sugar to the dry mixture

happy cooking!

xox

aj


{vegan} mexican stuffed bell peppers


Need something healthy, delicious, and quick on the menu this week? I have a winner for you!

Vegetarian Quinoa Stuffed Peppers

  • 4 large bell peppers- any color
  • 1 cup quinoa
  • 15oz. can black beans
  • 1 cup corn (frozen/can/or fresh!)
  • 2 green onions
  • 2/3 cup salsa
  • 2 Tbsp nutritional yeast (it’s a vegan substitute for cheese- you can use your favorite cheese too if you’re not vegan)
  • 1 1/2 tsp cumin
  • 1 tsp paprika
  • 1 tsp chili powder
  • 1/2 tsp garlic powder
  • 2 tbs hemp seeds
  • optional things to add: tomatoes, green chiles
  • optional toppings: guacamole, more salsa, more cheese (for non-vegan)!

Directions:

Cook quinoa according to package directions- you can use vegetable broth instead of water for more flavor. Meanwhile, halve bell peppers, remove seeds, stems, and ribs and preheat oven to 350.

Rinse and drain black beans, corn, and slice the green onions. In a large bowl add the cooked quinoa and all remaining ingredients except for the bell peppers. Salt and add additional spices to taste!

In a lightly oiled/sprayed 9×13″ baking dish, place your bell peppers cut side up. Fill/stuff each with a generous amount of filling. Make sure to fill all the crevices – press down and keep stuffing! Cover dish with foil and bake for 35-40 minutes. Then, remove the foil and bake for 10 minutes more. Enjoy!